- Photo Safaris
- Alaska Bears & Puffins World's best Alaskan Coastal Brown Bear photo experience. Small group size, idyllic location, deluxe lodging, and Puffins!
- Participant Guestbook & Testimonials Candid Feedback from our participants over the years from our photo safaris, tours and workshops. We don't think there is any better way to evaluate a possible trip or workshop than to find out what others thought.
- Custom Photo Tours, Safaris and Personal Instruction Over the years we've found that many of our clients & friends want to participate in one of our trips but the dates we've scheduled just don't work for them or they'd like a customized trip for their family or friends.
- Myanmar (Burma) Photo Tour Myanmar (Burma) Photo Tour December 2017 -- with Angkor Wat option
- Reviews Go hands-on
- Camera Reviews Hands-on with our favorite cameras
- Lens reviews Lenses tested
- Photo Accessories Reviews Reviews of useful Photo and Camera Accessories of interest to our readers
- Useful Tools & Gadgets Handy tools and gadgets we've found useful or essential in our work and want to share with you.
- What's In My Camera Bag The gear David Cardinal shoots with in the field and recommends, including bags and tools, and why
- Articles About photography
- Getting Started Some photography basics
- Travel photography lesson 1: Learning your camera Top skills you should learn before heading off on a trip
- Choosing a Colorspace Picking the right colorspace is essential for a proper workflow. We walk you through your options.
- Understanding Dynamic Range Understanding Dynamic Range
- Landscape Photography Tips from Yosemite Landscape Photography, It's All About Contrast
- Introduction to Shooting Raw Introduction to Raw Files and Raw Conversion by Dave Ryan
- Using Curves by Mike Russell Using Curves
- Copyright Registration Made Easy Copyright Registration Made Easy
- Guide to Image Resizing A Photographers' Guide to Image Resizing
- CCD Cleaning by Moose Peterson CCD Cleaning by Moose Peterson
- Profiling Your Printer Profiling Your Printer
- White Balance by Moose Peterson White Balance -- Are You RGB Savvy by Moose Peterson
- Photo Tips and Techniques Quick tips and pro tricks and techniques to rapidly improve your photography
- News Photo industry and related news and reviews from around the Internet, including from dpreview and CNET
- Getting Started Some photography basics
- Resources On the web
- My Camera Bag--What I Shoot With and Why The photo gear, travel equipment, clothing, bags and accessories that I shoot with and use and why.
- Datacolor Experts Blog Color gurus, including our own David Cardinal
- Amazon Affiliate Purchases made through this link help support our site and cost you absolutely nothing. Give it a try!
- Forums User to user
- Think Tank Photo Bags Intelligently designed photo bags that I love & rely on!
- Rent Lenses & Cameras Borrowlenses does a great job of providing timely services at a great price.
- Travel Insurance With the high cost of trips and possibility of medical issues abroad trip insurance is a must for peace of mind for overseas trips in particular.
- Moose Peterson's Site There isn't much that Moose doesn't know about nature and wildlife photography. You can't learn from anyone better.
- Journeys Unforgettable Africa Journeys Unforgettable -- Awesome African safari organizers. Let them know we sent you!
- Agoda International discounted hotel booking through Agoda
- Cardinal Photo Products on Zazzle A fun selection of great gift products made from a few of our favorite images.
- David Tobie's Gallery Innovative & creative art from the guy who knows more about color than nearly anyone else
- Galleries Our favorite images
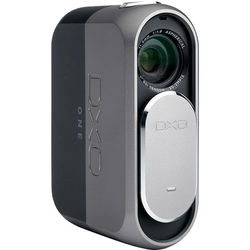
DxO ONE production review with sample, RAW, and SuperRAW images
DxO ONE production review with sample, RAW, and SuperRAW images
Submitted by David Cardinal on Tue, 09/15/2015 - 10:42
 As regular readers know, I’ve been having a lot of fun shooting with a DxO ONE alongside my more-traditional DSLR and compact cameras over the last few months. Until now, the software and firmware have been pre-release versions, so I haven’t been able to take you through them in as much detail as I would have liked, or post sample RAW and SuperRAW images. Now that the ONE is starting to ship that’s all changed, so here’s a more thorough look at the camera and its companion software. More importantly, here are some of the first real RAW and SuperRAW images that are available for you to evaluate on your own. #dxoone
DxO ONE overview & image quality
To get familiar with the unique DxO ONE, I strongly recommend starting with my Field-test of the DxO ONE hands on article. It will give you an idea of what the DxO ONE is, why it is different from previous smartphone add-on cameras, and how its impressively large sensor stacks up against larger and more expensive point and shoot competitors. Now, let’s dig into more details of how the released product version stacks up:

This is one of my favorite DxO ONE images – shot straight into the sunset

It’s large, 1-inch-format sensor allows the DxO ONE to capture images in low light,
like this one of AT&T Park taken at ISO 1250. f/1.8 @ 1/125s, –4/3 e.v.
Handling and carrying the DxO ONE
On its own the ONE is tiny. With its small size, solid build, and rounded corners, it slips easily into just about any pocket. When combined with your iPhone, though, the combination looks a little ungainly at first. In fact, I found it remarkably easy to work with. For shooting, of course, holding the iPhone in your left hand and the ONE in your right (with the shutter button) is most similar to a typical camera layout. One unusual thing about the way the ONE works is that you can reverse the two, and hold the ONE with your left hand, with the shutter button on the bottom, and use your left thumb to trigger the camera. The camera LCD will be upside down, but your phone display will automatically flip upright.
Even carrying my iPhone with ONE attached has turned out to be pretty simple. I can hold the iPhone in my left hand (the Lightning connector is stable enough that I haven’t felt the need to baby it or hold both the iPhone and ONE all the time) and bring it up to my eye when I’m ready to shoot. Similarly, the combination fits nicely in my front pocket (with the iPhone at the top), for easy access. It might not work as well if you’re in the habit of wearing tight-fitting jeans, though.
One of my favorite handling features of the ONE is that the connection to your iPhone can swivel 60 degrees in either direction. That means you can take low-level or high-level shots very easily. Flipping the connector around makes it a breeze to capture selfies. In selfie mode the ONE will use the display of your iPhone or iPad to help provide more even illumination for your face (something that would be of great benefit to many of the selfies that flood the web every day!)
One place where there has been a bit of confusion is over whether the ONE can be used with a case on your iPhone or iPad. Apparently the spec from Apple requires that cases provide space on either side of the connector (which makes sense since that is where the speakers are on some iPhones). However, many third-party cases don’t adhere to that spec, so if you’re using a case from a company besides Apple, you’ll need to take a look and see if there is some flat space on either side of the Lightning connector. If not you may need to do what I did and trim your case plastic to make for a secure fit.

Like with the sunset photo, the DxO ONE’s custom lens design helps it keep the misty glare
from the stadium lights from polluting the rest of the image.
Shooting with the DxO ONE: Dedicated iOS app
The DxO ONE application for iOS is a well-thought-out camera app that provides simple controls for quick shooting, while still giving advanced photographers a great deal of control over the camera. The first thing to remember is that, unlike other iOS camera apps, this one is not controlling the iPhone camera, so it is not subject to the limitations of the iPhone. For example, you can select shutter speeds up to 1/8000s, shoot RAW images, and crank your ISO up as high as 12,800 and beyond. In addition to a fully-automatic mode, the ONE offers Program, Aperture, Shutter, and Manual modes. Exposure compensation, flash, and a self-timer can be set in any of the modes, including Auto. One nice feature not found on most compact cameras is that you can capture RAW images even in Auto mode. Image quality settings are JPEG, RAW, and SuperRAW. There isn’t a RAW+JPEG mode in the current release of the software, presumably because the included DxO software automatically generates JPEGs from RAW images when you import them into your computer.
DxO has done a nice job of having the ONE application launch automatically when you attach the camera – assuming your phone is on and unlocked. If not, it can take a couple steps to power on the ONE and release the Lightning connector, then wake up your phone, and then connect the two. These screenshots from the ONE application on my iPhone will give you an idea of the clean and very usable app interface:

In Auto mode, the ONE app lets you select image quality, self timer, flash, and exposure compensation.
It also shows you the ISO, f-Stop, and shutter speed it has chosen.

In Aperture mode, you can also select your f-Stop and your ISO.
Here you can see I’m using a spinner to set f/9.

The ONE app provides a basic gallery viewer with album support.
You can also have your images stored on your iPhone and visible using Apple’s Photos app

The latest version of the ONE app provides a nice metadata display for individual images.
You can switch back to camera or gallery mode, or share an image, easily.
Loading and processing the images from your DxO ONE
Loading your images from the ONE onto your computer is trivially easy. DxO provides a dedicated application, DxO Connect, for both Mac and Windows. It works with either a USB-connected ONE, or if you simply insert the ONE’s microSD card into your computer. It allows you to put the images where you want, optionally organized by date, and to delete those you don’t need.
Image processing is another area where the ONE really shines compared to most compact cameras. DxO has made its reputation providing advanced image processing software for smartphones and cameras. Every DxO ONE image is automatically processed with a version of that technology as part of importing the RAW files to your computer (or indeed, by the camera itself if you ask it to create a JPEG). The processing is automated, but also intelligent, meaning it does an excellent job on most images. For more advanced processing, every DxO ONE shipped (at least for now) includes a license for DxO’s advanced desktop products – DxO OpticsPro and DxO FilmPack. DxO Connect will transfer your images into OpticsPro with a single click. From there you can either apply any of the same image presets that the ONE uses, or customize the look of your images to your heart’s content.

The DxO ONE’s small size makes it a great “walking around” camera,
whether shooting attached to an iPhone or on its own
Sample images from the DxO ONE
We've provided a variety of images, including some "everyday" walking-around images, Raw and SuperRAW comparison, and low-light (high ISO) comparison images. Raw files for all of them are in the links at the end of the article.
Snapshots
First, here are some “grab shots” that I took of deliberately tricky scenes, shot on full Automatic, just to give you an idea of how the camera performs. As with all the sample images in this review, the un-altered RAW (or SuperRAW) image is available through the link at the end of the article.


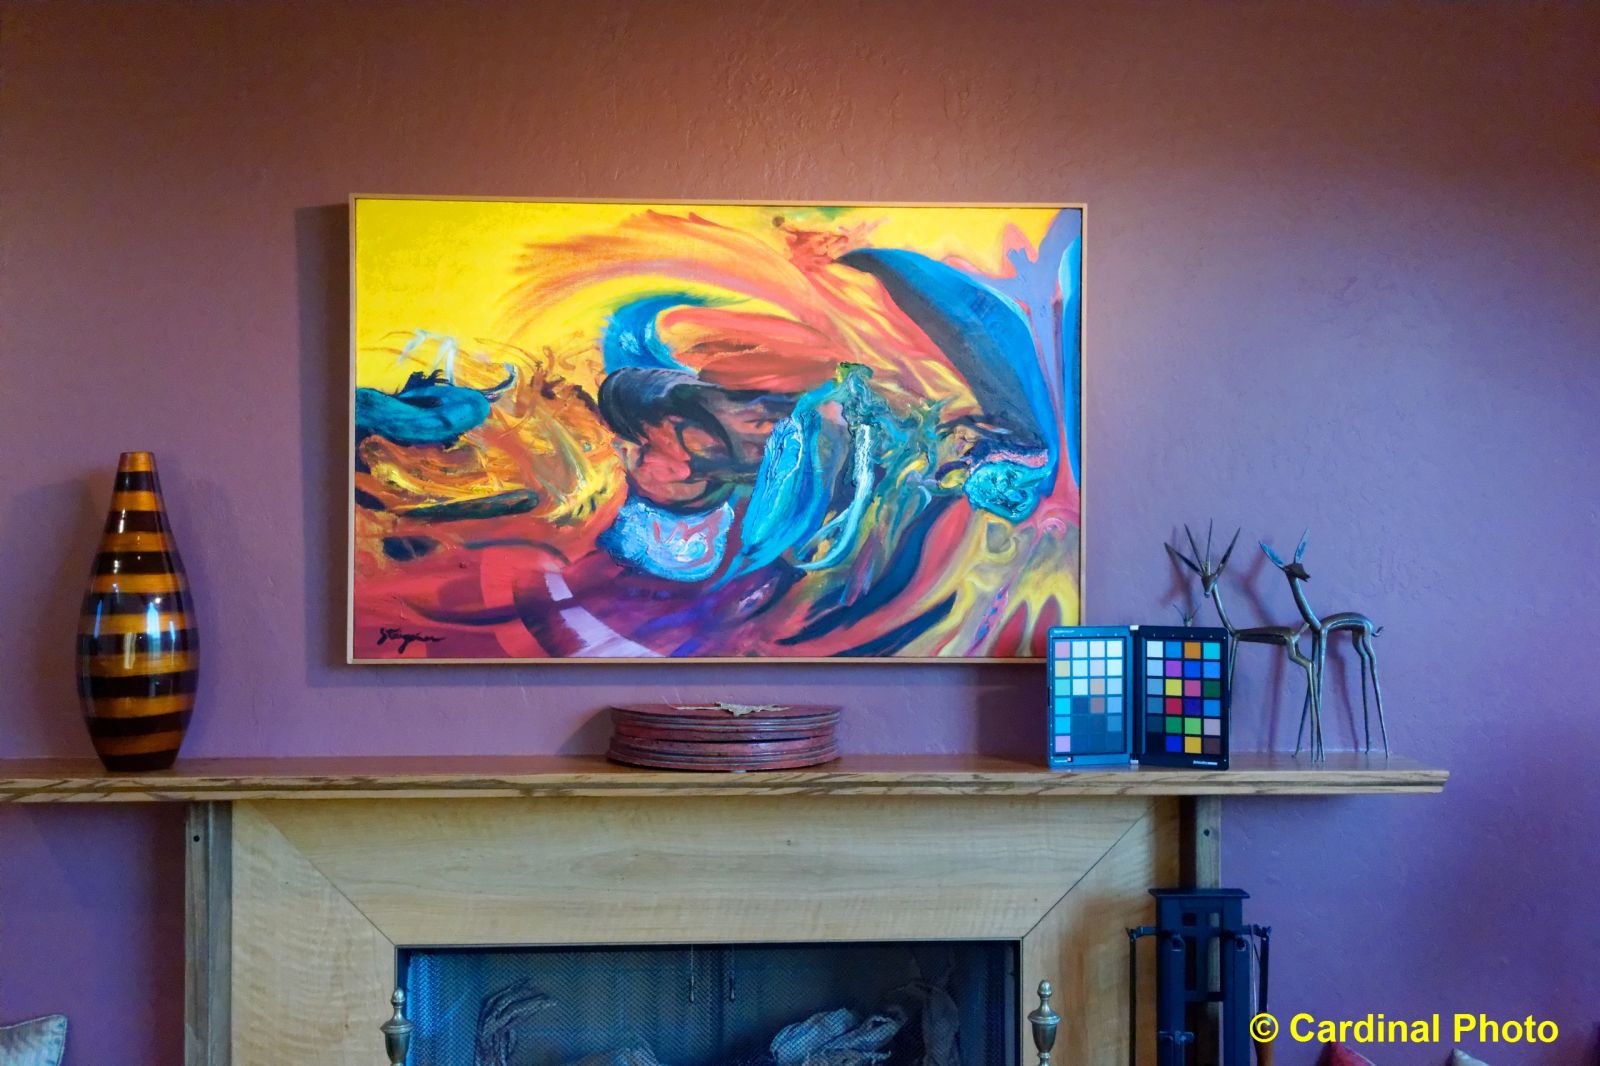
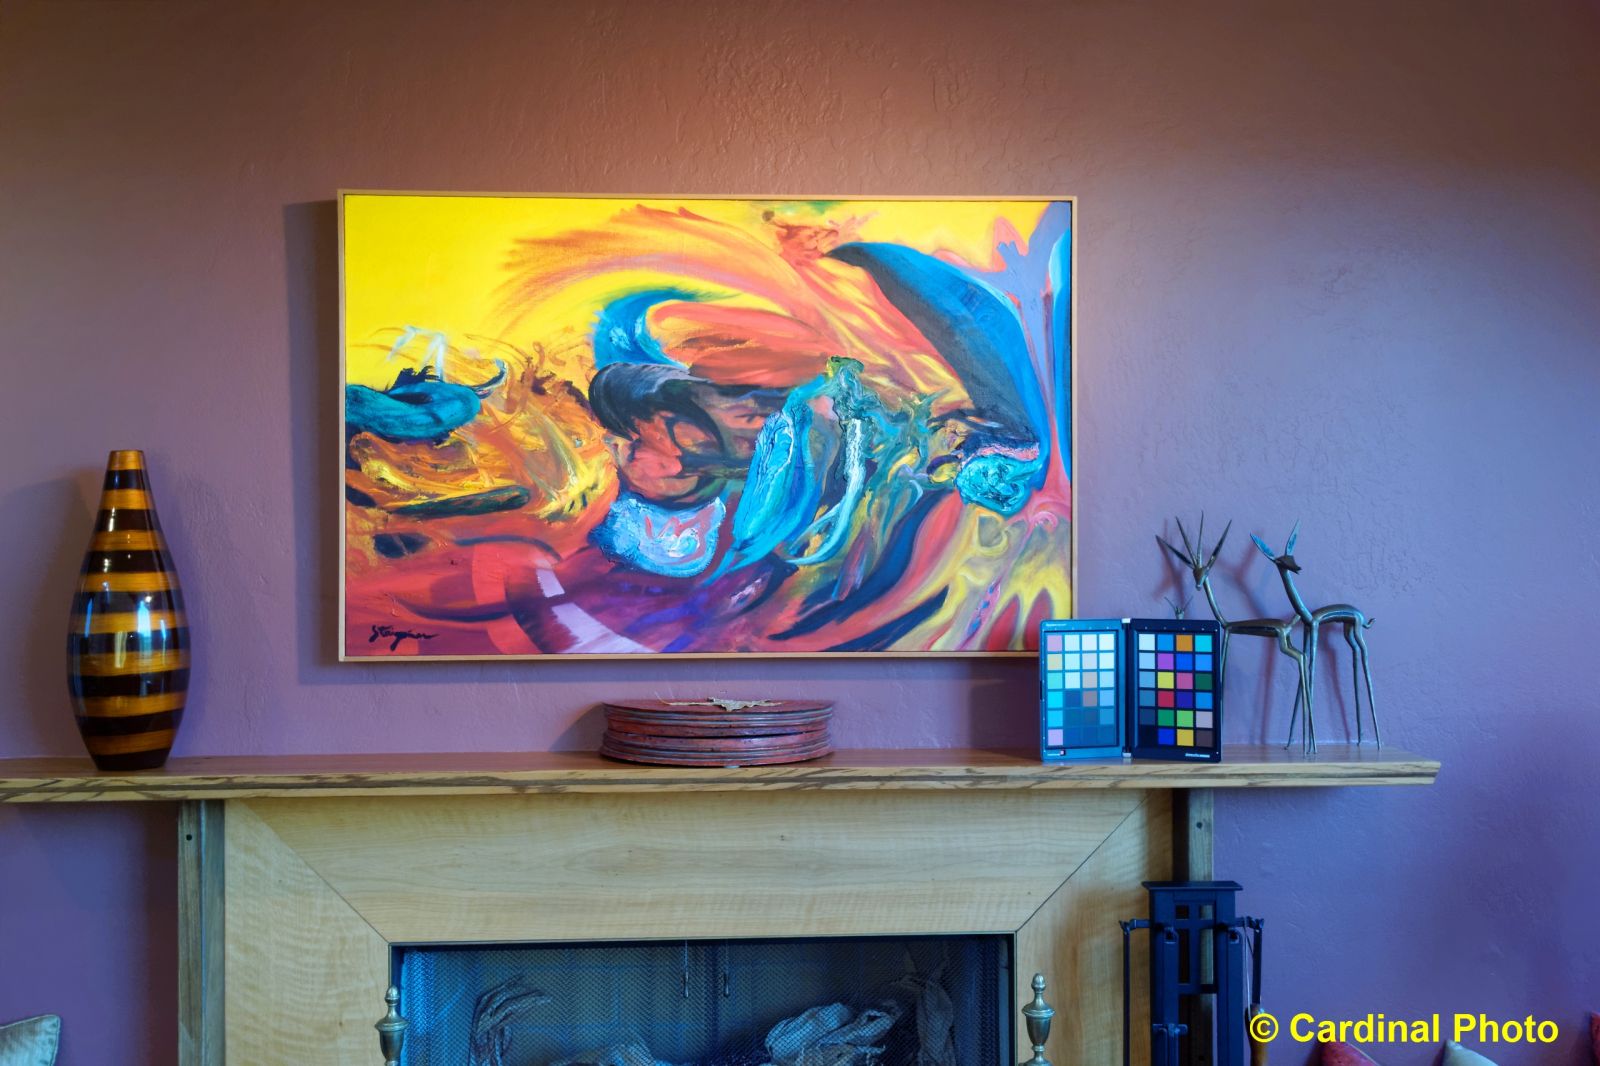
Raw versus SuperRAW, at Low and High ISO
For these images I attached a clamp to the ONE, and then put it on a tripod. It isn’t a perfect solution for holding the camera still (a true body plate screwed into the camera would be a little better), but did a pretty good job. I then put the ONE on Auto, and took Raw and SuperRAW images of the same indoor and outdoor scene. I processed them using the default settings for the ONE in Optics Pro 10. You can find the original Raw images by following the link at the end of the article. Remember, these images are copyrighted, and are for your private use and evaluation of the ONE only.

Outdoor RAW image
(converted to JPEG, see link at end of article for original)

Outdoor SuperRAW image
(converted to JPEG, see link at end of article for original)
Raw versus SuperRAW Indoors (high ISO):
Indoor (high ISO) Raw image
(converted to JPEG, see link for original)
Indoor (high ISO) SuperRAW image
(converted to JPEG, see link for original)

I shot this tricky overcast evening scene using SuperRAW,
to see if the rippling waves would be a problem, but the DxO ONE handled them very well.
Bottom Line: Is the DxO ONE right for you?
-
If you want to take your iPhone photography to the next level, and don’t feel that requires adding a zoom lens, the DxO is a great choice. The only question is whether you have $600 in your budget.
-
If you’re tired of carrying both a smartphone and a compact camera around, and want to combine the best of both, then if you’re okay with the 32mm fixed-focal-length lens, and don’t need to worry too much about tracking action, the DxO ONE may be the perfect solution.
-
If you’re expecting to magically replace a long-lens-equipped DSLR for photographing wildlife or sports, that’s not going to happen – at least not with this version of the ONE. However, for landscapes or other situations where the 32mm lens works – and especially where you can use SuperRAW, you can get very similar image quality in a much smaller package.
The good news for those of you who are eagerly-awaiting the DxO ONE since its announcement is that it is about to ship. You can pre-order a DXO ONE from B&H for $599 – they are currently expecting to start shipping them on September 24th. Remember that while the ONE does come with an impressive array of software (worth several hundred dollars by itself!), it doesn’t come with a microSD card. I highly-recomment the 64GB Extreme UHS-I microSDXC Memory Card (U3, Class 10) -- about $55 from B&H.
Original Raw & SuperRAW images
Zip files containing the RAW & SuperRAW originals are here (500MB – Comparison shots & Menlo Park shots) and here (MB – San Francisco shots)
- Log in to post comments

Latest posts
-
Tue, Jun 14 2022
-
Fri, Jul 9 2021
-
Mon, Mar 1 2021
-
Tue, Mar 3 2020
-
Wed, Jan 15 2020
-
Mon, Nov 11 2019